I'm a neat freak tackling messy projects to help you turn your honey-do list into honey-DONE! I'm an average mom, with an average home, and an average budget with a goal of making things that feel ABOVE average! I'm a self-taught DIYer learning as I go, and I share all of my projects in real time so that, when I make a mistake, we can grow together! Join me daily on Instagram stories where I share home DIY projects, life with my family, and a little bit of everything in between - I can't wait to meet you! :)
Categories
projects & tutorials
home decor
Tips & Tricks
lifestyle
I'm Kayla
Hi, there!
Board and Batten Nursery Wall – Full Tutorial
January 16, 2023
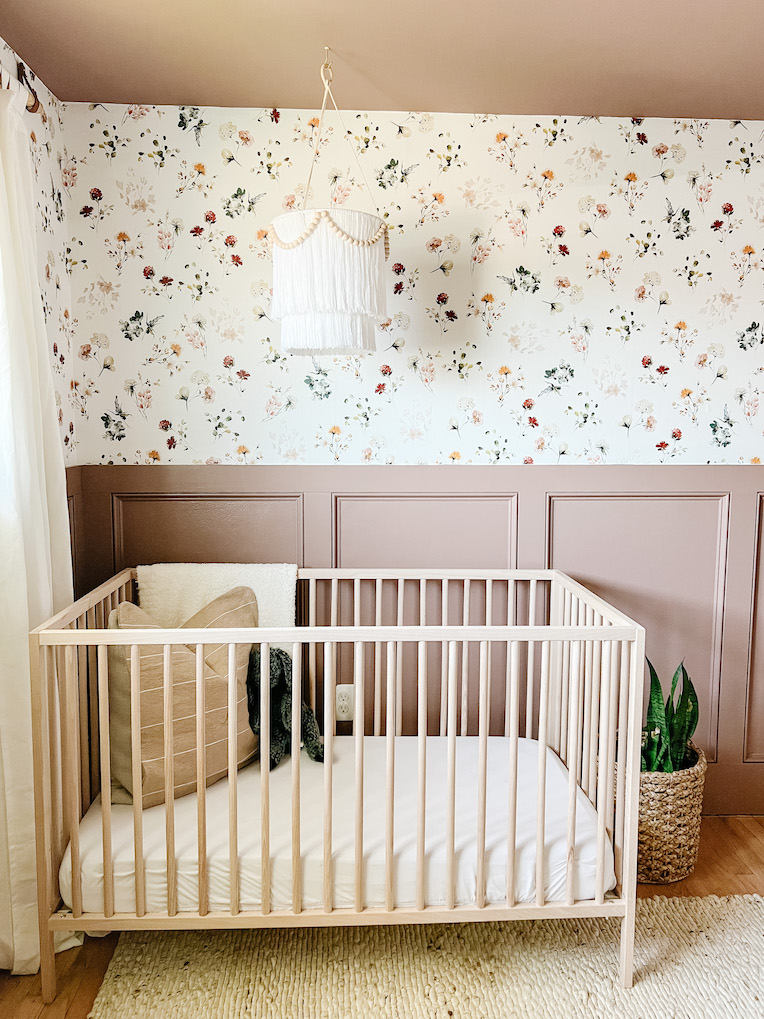
For my daughter’s nursery room, I wanted to include a board and batten wall for a more modern look. A board and batten accent wall is the perfect DIY project for beginners! Below is the full board and batten tutorial I installed with just a couple of power tools (one of the reasons accent walls are a great place for beginners to start!)
There are many different styles you can choose from for your board and batten nursery wall. For my daughter’s nursery walls, I decided to build the board and batten on the bottom half wall with wallpaper on the top half. But I’ve also done wall treatments like this to freshen up a blank wall in my living room and dining room! The possibilities are endless with so many batten wall ideas!
Materials Needed:
-Baseboards: 7.25” MDF Boards
–Board and batten decorative moulding: PVC base cap, model #L182450BC8
Tools Needed:
–Miter Saw: I used RYOBI sliding compound Miter Saw from Home Depot
Other Details:
-Ceiling Height: 8’
-Door Trim 3.75” MDF Board
-Door Trim Paint: Benjamin Moore Chantilly Lace, semi-gloss
-Board and batten spacing: use “wainscoting layout calculator” on inchcalculator.com
-Wallpaper: Wallblush Wildflower
-Paint Color: Benjamin Moore Dusty Ranch Brown, lightened 50%, semi-gloss
–Pre caulking filler rope (optional)
Step 1: Choose a Board and Batten Design
The first thing you’ll need to do for your board and batten wall is pick a design. There are many different board and batten ideas online to choose from to create your perfect accent wall. Whether you are building board and batten on the entire wall to create a focal point or you’re building it on half of the wall to create more visual interest, either way is a great way to bring a beautiful and classic look to the whole room.
I decided to add board and batten on the bottom half of the wall with wallpaper on the top half. Keep reading to find out what wallpaper I chose!
Step 2: Remove the Baseboards
Once you’ve figured out your board and batten design, it’s time to remove the existing baseboards, shoe molding, and/or crown molding. I used a trim puller and rubber mallet to take off the baseboards. I also used needle nose pliers to take out any remaining nails.
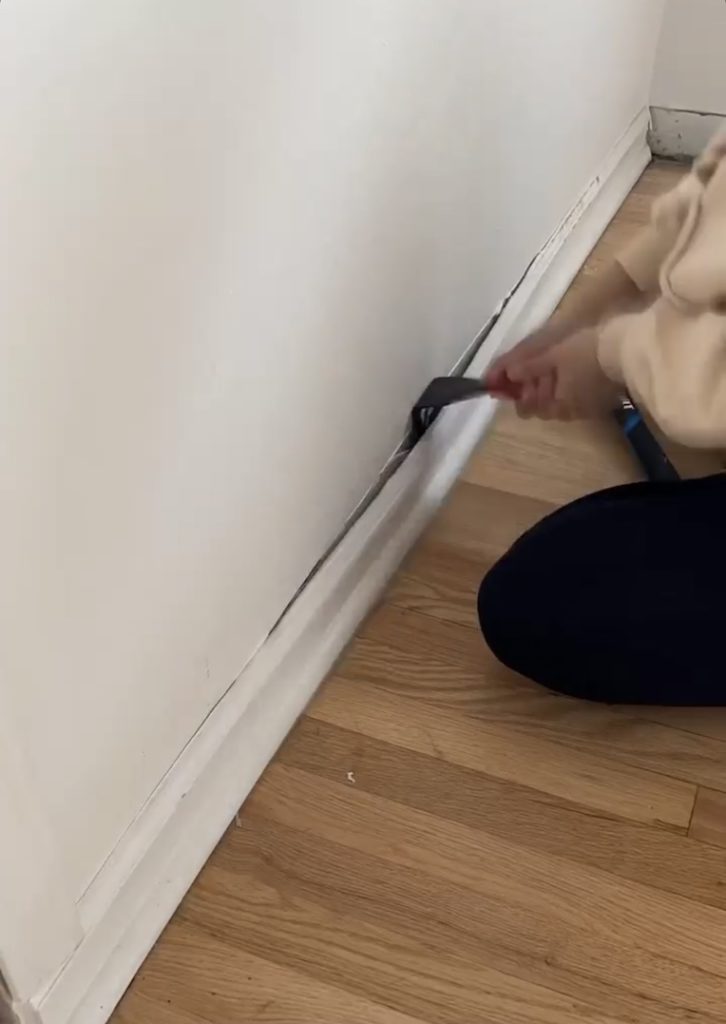
Since I was already replacing all of the trim pieces in my house, I went ahead and removed all of the door trim in the room too.
Step 3: Install the New Baseboards
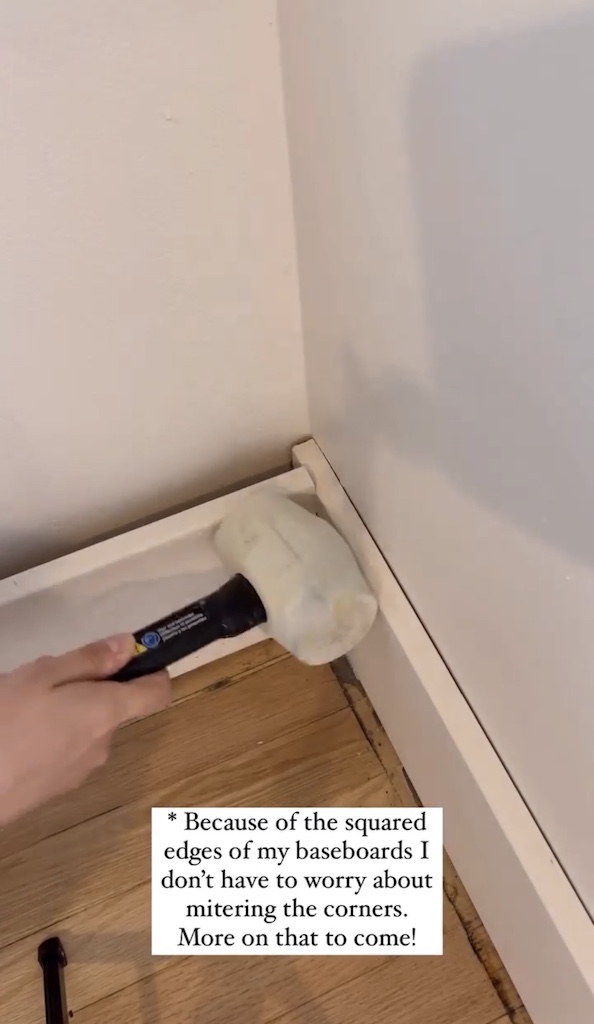
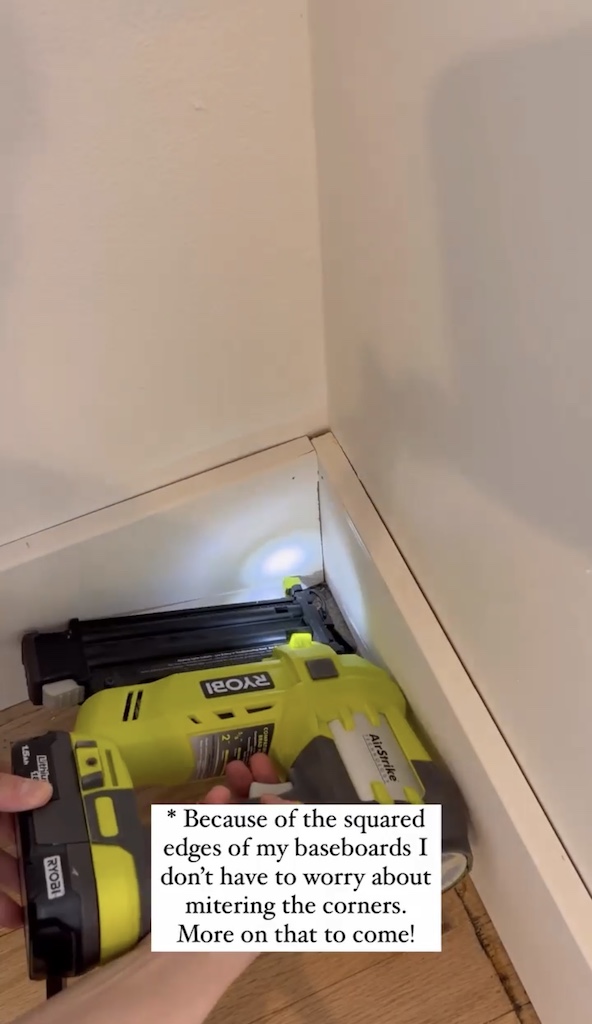
The next step is to install the new baseboards. Because of the squared edges on the baseboards I’m installing, I don’t have to miter the corners. Yay!
For this step, I used my measuring tape to measure out the length I needed the baseboards to be, I cut it to size, then placed the baseboards using a rubber mallet. Then I used my nail gun to secure it. Note: I always recommend using brad nails instead of liquid nails because liquid nails can be so damaging to your drywall.
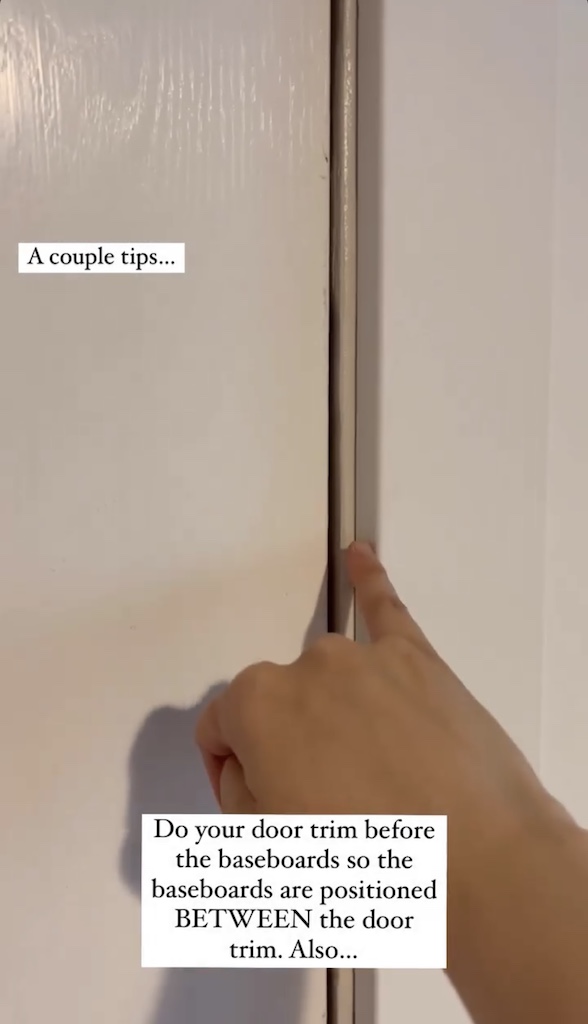
If you’re like me and you’re replacing your door trim too – I have a tip for you! Install your door trim before the baseboards so the baseboards are positioned BETWEEN the door trim. Another tip when installing door trim is to slightly offset the trim to create a ‘reveal’ found on windows and doors.

Also, this retractable extension cord came in so much handy for this project! I highly recommend it for projects like this one!
Step 4: Wallpaper and/or Paint (Optional)
It’s finally time to make the room pretty! If you’re installing a half wall of board and batten, then wallpaper or paint are both great ideas for the top half of the wall.
Wallpaper and paint can make a huge impact on the look of the room. I went with this Wildflower wallpaper from Wallblush and love how it looked with the paint color I chose for the board and batten!

If you’re installing a full wall of board and batten, then another option would be to paint all of the board and batten and wallpaper or paint the rest of the room. There’s so many different routes you can take with this project. The sky is the limit!
Step 5: Build the Board and Batten Nursery Wall
Now its time for the fun part- build the board and batten nursery wall! I had a hard time choosing between wide boards and slim boards, but I ended up going with the slim boards.
Once you’ve figured out the size of your boards, you can determine the spacing of the boards using the wainscoting layout calculator on inchcalculator.com. I found this to be the easiest way to determine the spacing of each board. Be sure to read my post, “The Best Board and Batten Calculator” for more tips on measuring out your board and batten nursery wall.
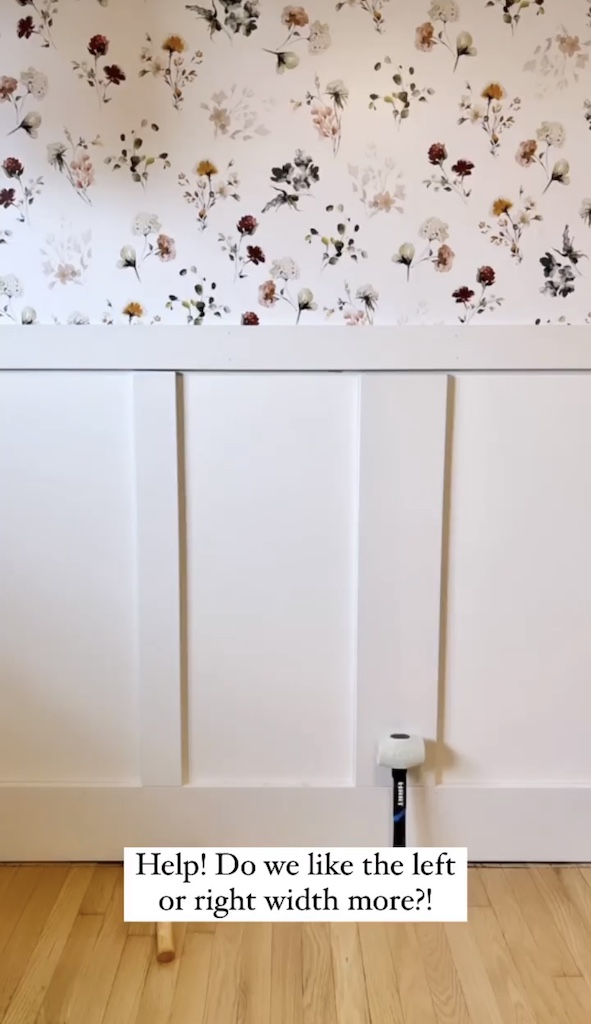
Now that you’ve got your spacing figured out, the first step is to install the horizontal boards. The top of the board should go just above the paint or wallpaper. This should be about midway up the wall or in thirds, such as 1/3 or 2/3 up the wall.
Before nailing it to the wall, use a level to ensure everything is aligned properly. If you’re installing a whole wall, I would start with the horizontal pieces first before moving on to the vertical boards.
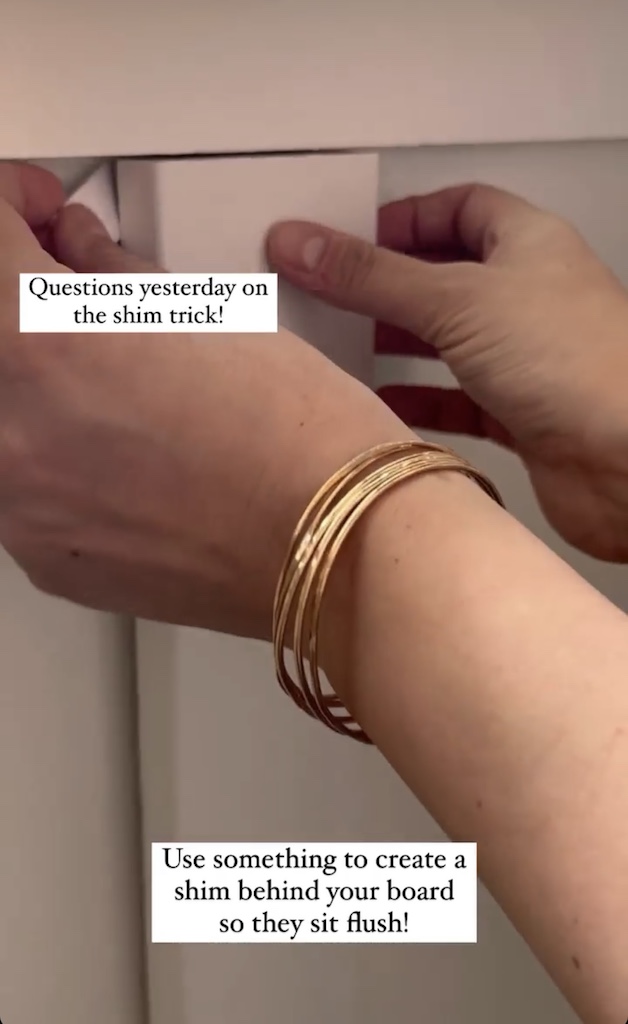
Once you’ve installed all of the horizontal boards, it’s time to start installing the vertical pieces. One thing I learned while installing the vertical boards was to use a small piece of wood to create a shim behind your boards so they’ll sit flush against the wall. Then, when it’s time to apply the wood filler, caulk and paint to the nail holes and cracks/seams, it will look more seamless.
Step 6: Paint the Board and Batten Nursery Wall
Now for the finished product – paint! Before painting, you’ll want to fill any holes and cracks with wood filler and caulk. If you’re not sure where to use wood filler vs caulk, read THIS POST.
Once you’ve done that and sanded it down, you can start painting. I used Benjamin Moore Dusty Ranch Brown, lightened 50%, with a semi-gloss finish.
I found it easiest to paint around the horizontal and vertical boards first and then go in with a paint roller between the batten pieces.
Once it’s painted, you’re all done! It’s time to sit back and enjoy your new room and start decorating!
Before and After Photos
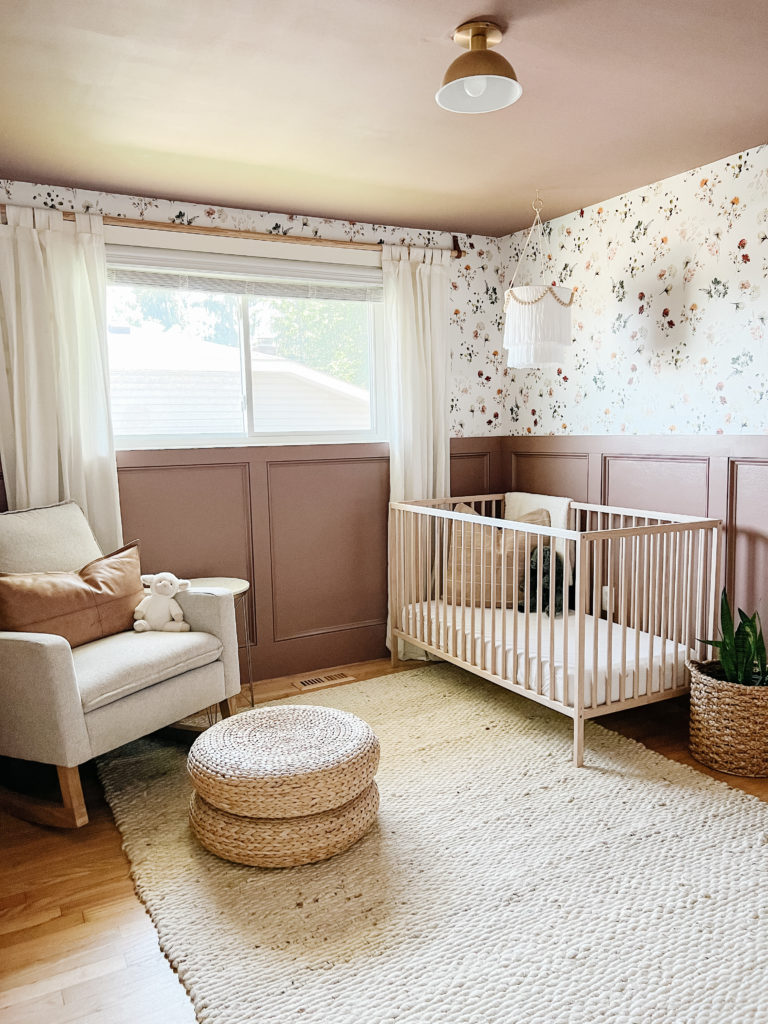
Thank you to Extra Space for sponsoring this project!
If you enjoyed this project and want to see more like it, follow along on Instagram @itshoneydone so I can help you turn your honey-do list into honey-DONE!
Note: As an Amazon Associate I may earn small commissions from qualifying purchases.
Related Posts:
My Two Favorite Caulking Tricks
Caulk vs Wood Filler- The Right Choice for Your Project
