I'm a neat freak tackling messy projects to help you turn your honey-do list into honey-DONE! I'm an average mom, with an average home, and an average budget with a goal of making things that feel ABOVE average! I'm a self-taught DIYer learning as I go, and I share all of my projects in real time so that, when I make a mistake, we can grow together! Join me daily on Instagram stories where I share home DIY projects, life with my family, and a little bit of everything in between - I can't wait to meet you! :)
Categories
projects & tutorials
home decor
Tips & Tricks
lifestyle
I'm Kayla
Hi, there!
DIY Air Conditioner Fence Cover
January 18, 2023
Let’s be honest: almost everyone has an AC cover and almost everyone’s is ugy! I was blown away by the responses I got on this DIY air conditioner fence cover. I’m so excited to share with you a step by step process on how to make your own! This DIY project is a great way to spruce up your outdoor space for little to no cost at all.
I decided to build this cover for our outdoor air conditioner unit while I was revamping our patio area. After completely demolishing our back deck, we laid a new concrete slab, put in some string lights, and I even built a privacy fence.
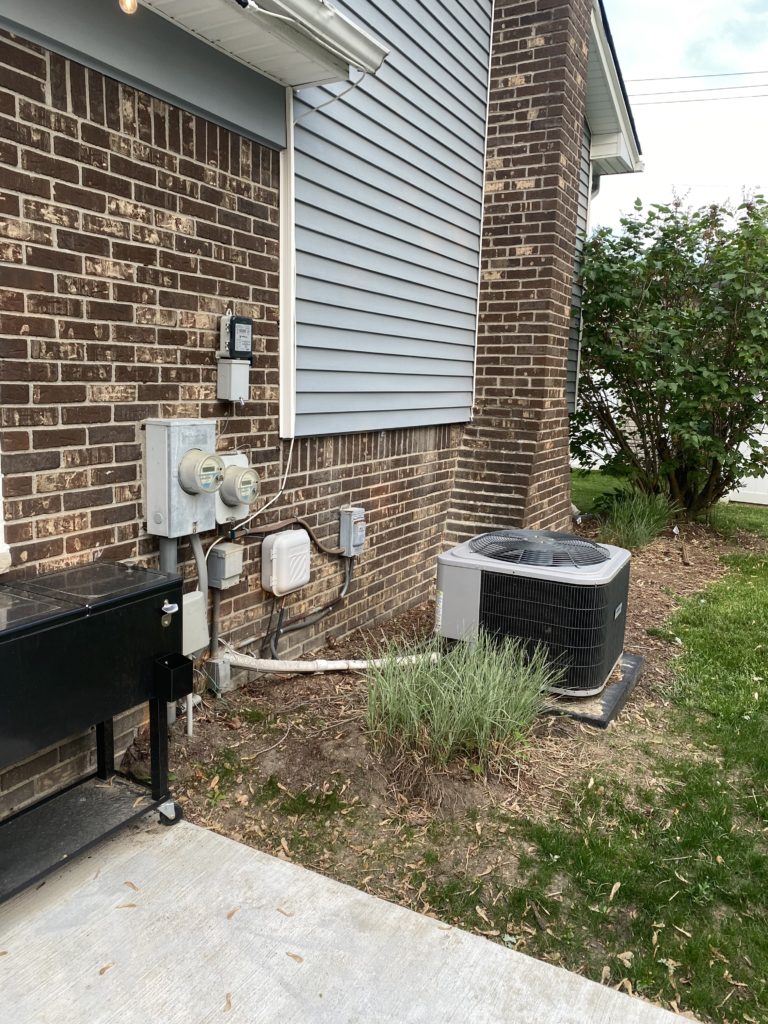
After doing all of this, I felt it was necessary to cover up our AC unit because it sits right next to our patio and I wanted to make it look a little nicer. This is also a great DIY idea if you have trash cans ruining the look of your outdoor area or want to find a way to hide something unsightly!
Whatever the case may be, try building this DIY fence cover or some type of lattice screen to hide them!
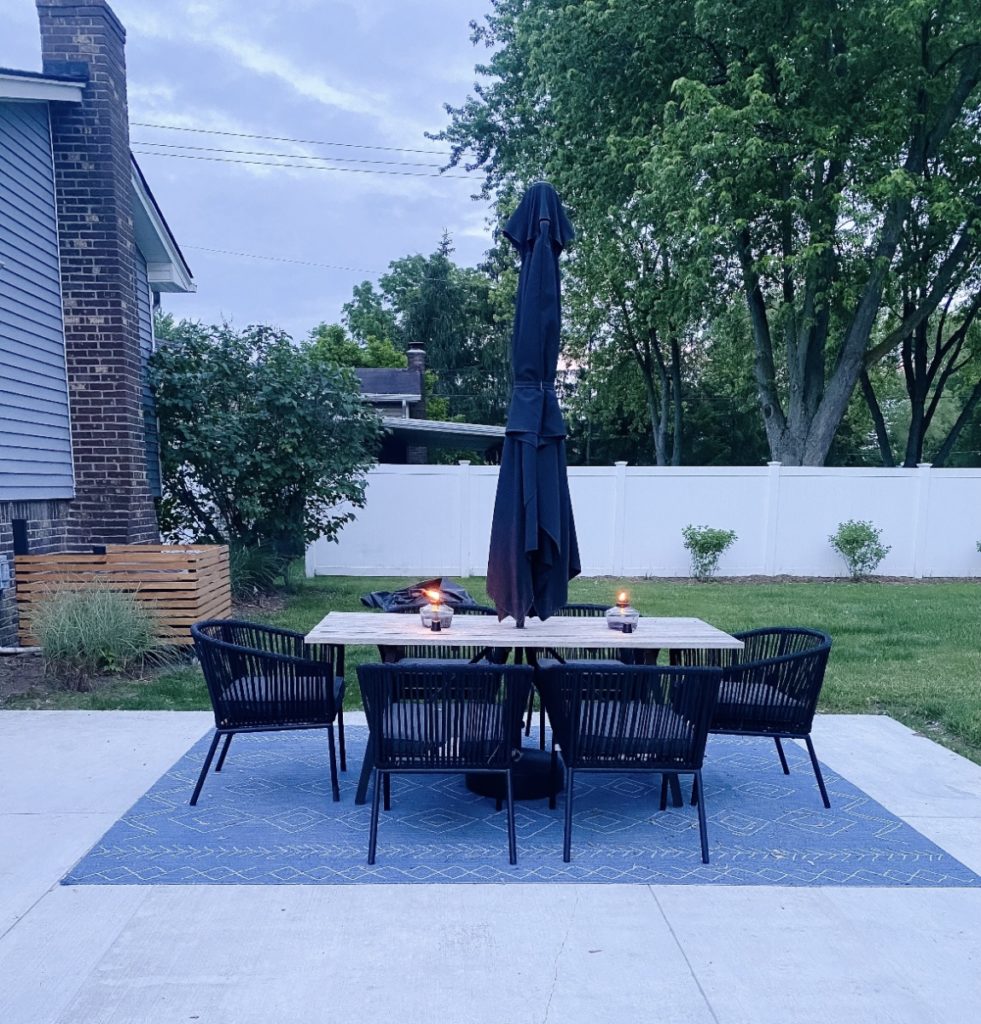
My inspiration for the DIY air conditioner fence cover is the privacy wall I just built. I wanted the wooden slats to look identical to the wooden slats on the privacy wall. I’m so happy with how it turned out and I think it made the whole area look so much nicer!
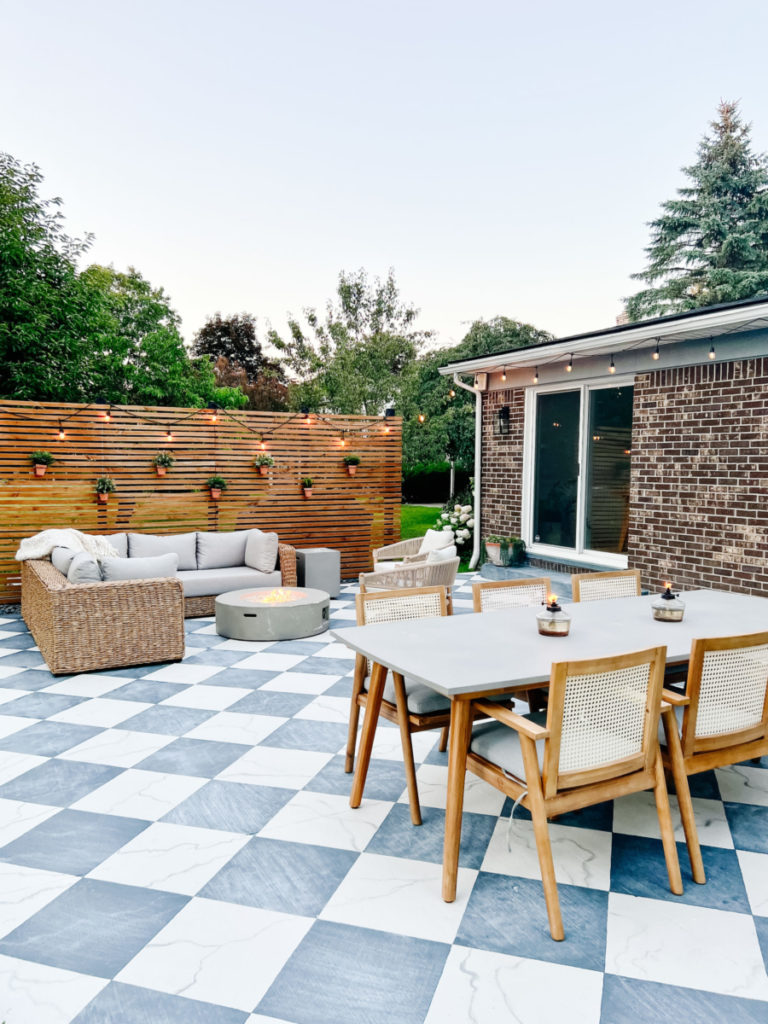
This outdoor project is beginner-friendly, budget-friendly, and a great way to add some curb appeal to your outdoor space!
Maintenance for your DIY Air Conditioner Fence Cover
The DIY air conditioner fence cover is low-maintenance once it’s been built. The only things you may need to maintain throughout the year are paint touch-ups on the poles and keeping up with the yard work in the surrounding area.
I started the wooden planks about 6 inches away from our outdoor AC unit to ensure there’s enough space and easy access for routine maintenance around the air conditioner cover and whole HVAC system throughout the year. The one I built only has 3 side panels built off of the 3 fence posts with the top and back sides remaining open. This helps create a well-ventilated structure and proper airflow.
Cost
This project was built almost entirely for free. All of the scrap pieces I used were leftover from the privacy wall which was the perfect way to not let anything go to waste.
I used pressure treated pine cut into 1 x 6 boards and ripped those down into 2 inch slats. I already had all of the materials and tools I needed on hand. Pressure treated lumber is key for an exterior project!
The only thing I needed to pay for this project was a stain/sealer. I used Valspar Canyon Brown, and it only cost me $60. This made for a quick and easy weekend project!
Materials/ Tools Used:
-Posts: 4 x 4 pressure treated pine
-Slats: 1 x 2 pressure treated pine
-Paint: Tricorn Black
–Stain and/or Sealer – I used Valspar Canyon Brown
-Cordless hedge trimmer (optional)
Clean up the Surrounding Area
I had a few shrubs that needed to be trimmed up around the AC unit before building the fence around it. This tool was the best way to get the surrounding area cleaned up nicely.
I also added a new plant to the side of the unit so it wasn’t just a random fence on the side of our house. If you don’t already have any landscaping around your outdoor unit, I would recommend planting a flower bed around it or a adding a plant just to make it look even better over on this side of the house!
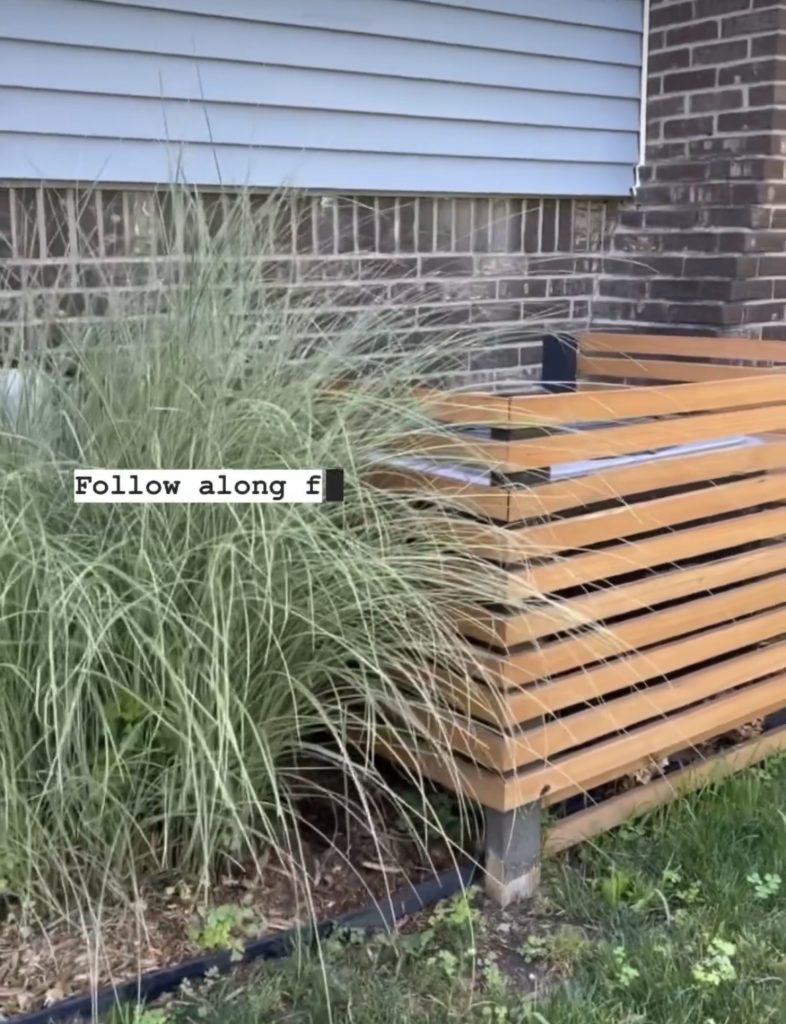
Insert the Poles
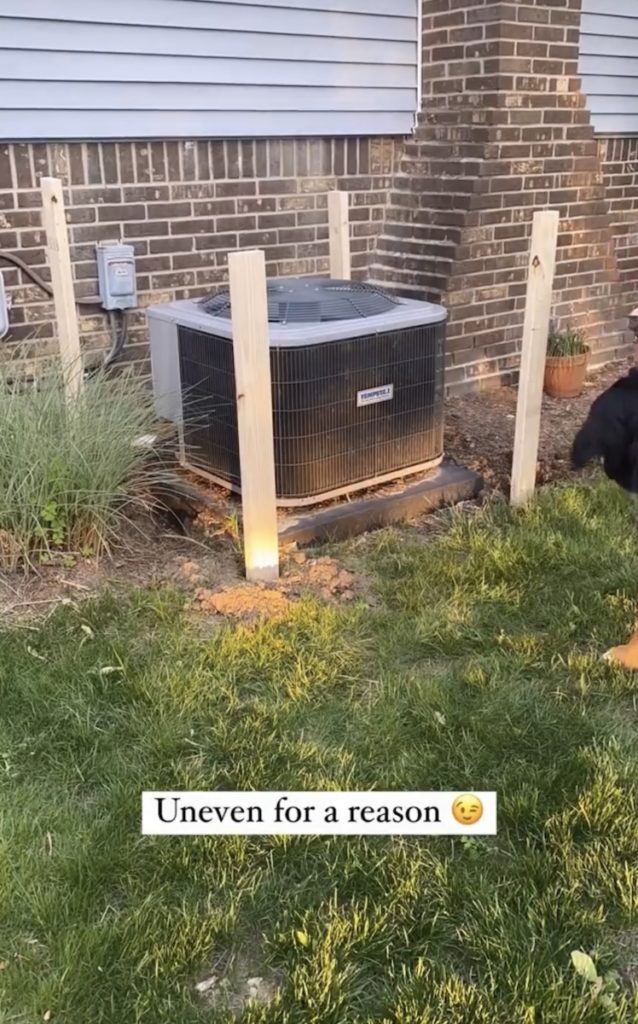
Once you’ve got the surrounding area cleared up, you’re ready to start digging holes to insert the poles. Before cutting the wood posts for your DIY air conditioning fence cover, you’ll need to measure the height of the unit so you can determine how high the top of the posts need to be. My cuts were about 6 inches above the top of the unit.
I dug the holes for the vertical supports based on the height of the poles. I dug about 1/3 of the height of the pole and I actually did this by hand since the holes didn’t need to be very deep. You may also need to research your climate’s frost lines to determine appropriate depths!
If you have to go further into the ground, I would recommend using an auger. This is the tool we used to insert the poles for the privacy screen since those were quite a bit larger. I also dug the holes with my hands because we have a lot of wires around the AC unit and I didn’t want to accidentally cut through one of those- something to keep in mind if you do choose to use an auger. I recommend contacting your state’s free, local resource for identifying electrical wires. In Michigan, this is via Miss-Dig.
Another thing to keep in mind is to check for frost lines to determine the depth of your posts. This can be different for everyone’s area so it’s important to check that before digging your holes out for the posts.
After digging the holes, I centered the posts, made sure they were level, and then I put Quickrete in the hole around it. After that dried, I painted the posts Tricorn Black and moved on to step 3.
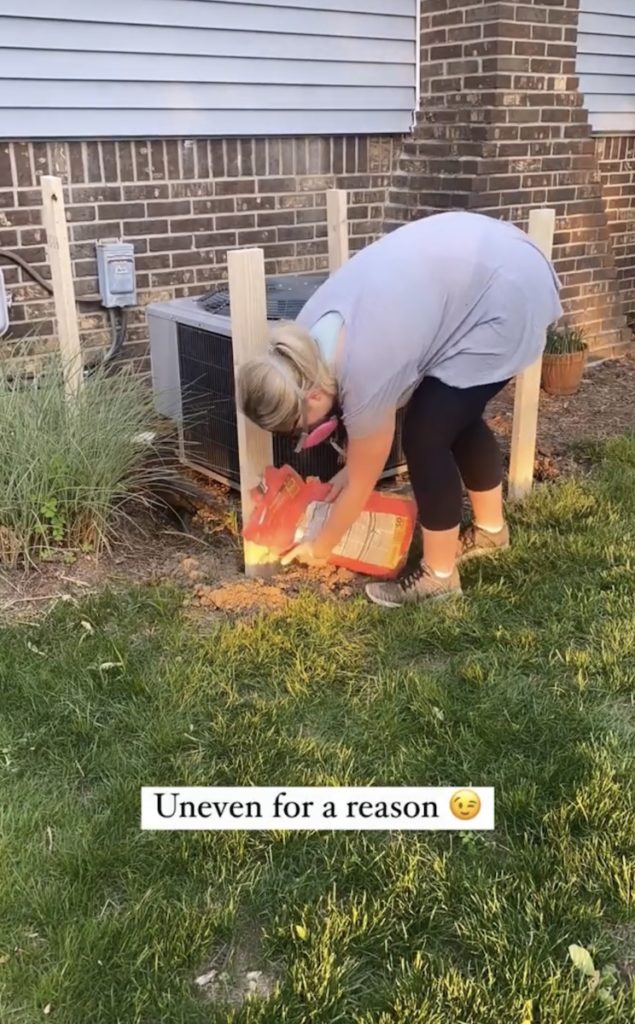
Nail in the Horizontal Wooden Slats
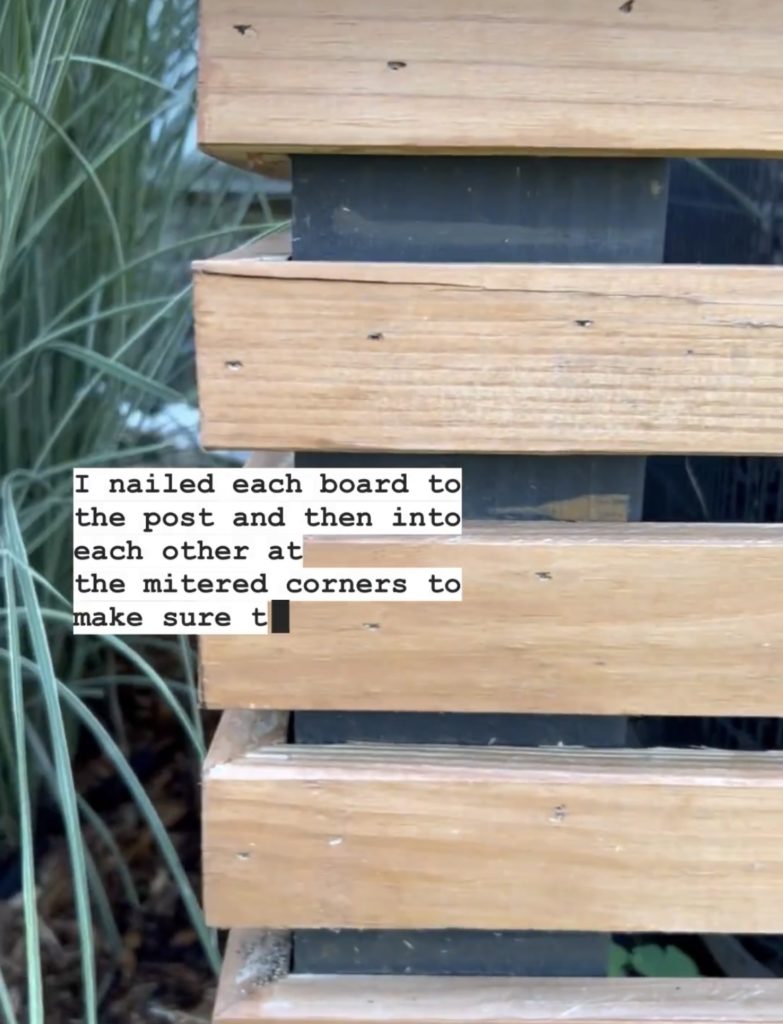
Now that you have your posts in the ground and stable, you can start building your fence! I decided to miter the ends of the boards so they didn’t have a butt joint but this step is completely optional. I’m happy I ended up doing it this way because I think it made a more clean and crisp look around the corners.
Once you’ve got your horizontal slats ready, you can start nailing the ends together. I used this cordless nailer with galvanized nails for this step. For the spacing, I laid a slat on its side to act as a spacer and to figure out how far apart each one should be. After you’ve built three sides, this creates a solid wooden cover that should be enough to cover the entire unit.
Stain and Seal
After building your air conditioner fence cover, you can stain and seal the wood. I used a a pre-tinted exterior wood stain and sealer called in the color Canyon Brown. This will help protect the wood in harsh weather conditions.
After staining and sealing the wood, you’re all done!
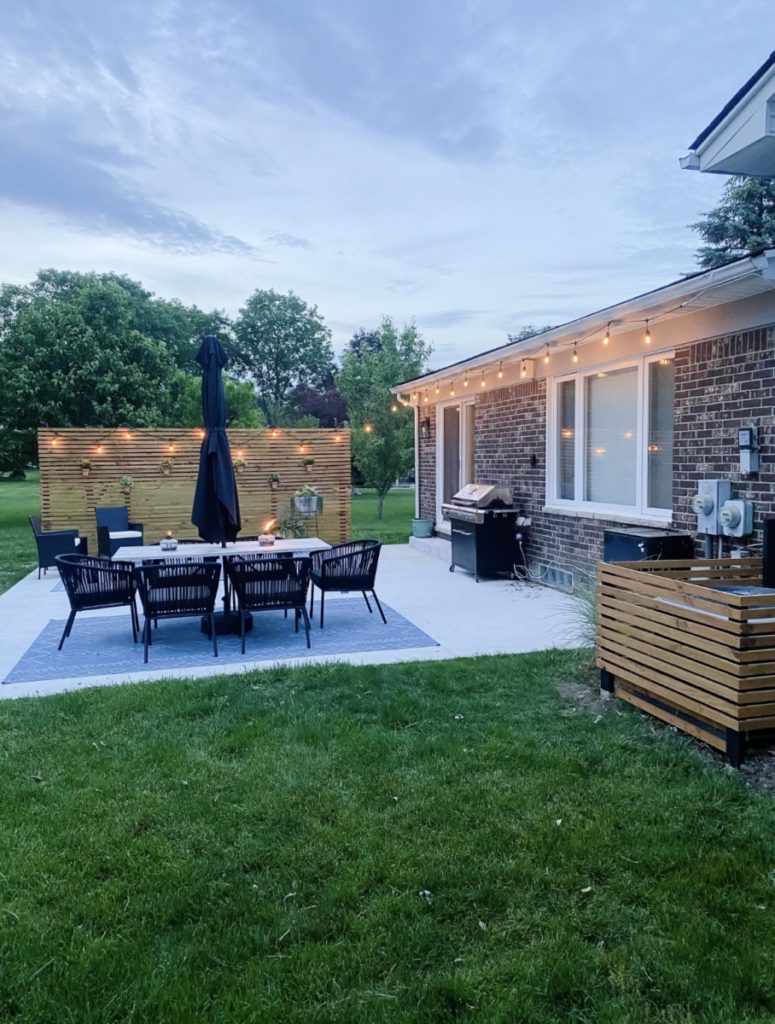
To see this project in real time, check out my Instagram reel below and follow along for more budget-friendly DIYs!
https://www.instagram.com/reel/Cf_svN6gtR8/?utm_source=ig_web_copy_link
Note: As an Amazon Associate I may earn small commissions from qualifying purchases.
Related Posts:
DIY Privacy Wall [ Step-by-Step Tutorial ]


Excellent article! Please continue sharing such remarkable content. If you’re in need of professional services, be sure to explore the following resources.
Thank you!
Looks lovely! Thank you for the article! I keep re-reading trying to figure out ‘uneven for a reason’ and can’t figure it out! Did I miss it or is that a hint at another project?
Thank you for reading! We made it this way so they would all be level.